Here’s an article that you can take and use right away, especially to track the progress of your child with dysgraphia or other fine motor skills issues!
Many kids struggle with fine motor skills, yet they are not severe enough to warrant OT services, either through a school district or private services. Here are some simple ways to teach, train, and evaluate handwriting skills.
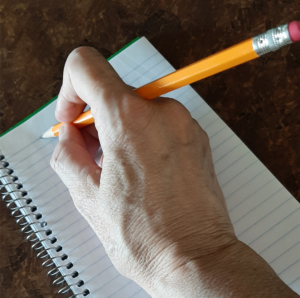
The correct way to grip a pencil is to pinch the pencil with the thumb and forefinger, then let the pencil to naturally fall into the cradle of the space between them. Curl the other 3 fingers underneath to be a buffer between the pencil and the paper. The pencil will rest near the tall finger for stability. Many kids use the middle finger as the guide for the pencil and allow the ring finger to be the buffer between the pencil and paper. This restricts the movement of the wrist and other fingers.
1. Pencil grip is important.
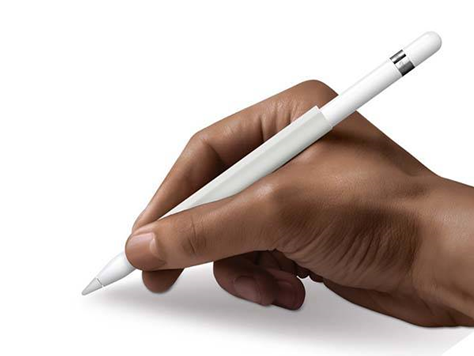
A second appropriate way to grip a pencil is one that is often used by artists. This alternative grip can be a less confusion option for some kids. Place the pencil between the index and middle finger from the top of the hand. The movement of the pencil is still guided by the index finger and thumb. This grip actually works much like the traditional grip, but the pencil is held stable because it rests between the index and middle fingers. The wrist is still allowed to have flexible mobility, and the strongest fingers still guide the pencil.
So what to do if your child simply can’t remember to grip the pencil the way the hand works.
Handwriting can improve immediately when a child grips the pencil the way the hand functions. Many kids get into habits that actually make the pencil floppy that results in wobbly lines. An improper pencil grip can also make the child’s hand and arm hurt. If a pencil grip results in pain, that could be an indicator that just using a pencil causes bone or muscle aches. If this has already become a habit, the child may think that changing to a proper pencil grip is uncomfortable and rejects retraining.
If your child’s arm seems to tire easily, provide toys that require squeezing and pinching. Example, play games with squish/stress balls and include in the rules that you have to squeeze the ball 3 times before tossing it. Clothespins can make fun games. You can find many fun ideas by looking for birthday party clothespin games. Peg boards and stringing beads on chenille stems (pipe cleaners) are other great activities that build fine motor skills.
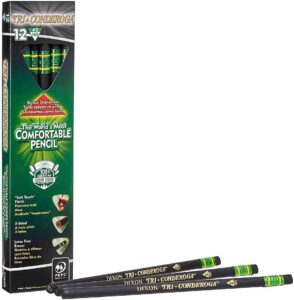
The first and least intrusive intervention is to use triangle pencils. I will provide links to some of my favorites, but there are a variety of sizes of triangle pencils. Pick the one that seems to be a best fit for your kiddo.
If your child still has difficulty using a triangle pencil, you may want to consider one of the many different pencil grips that slip onto a pencil. Here are different options.
Training proper pencil grip takes consistent gentle, kind correction. If you think your child has more significant fine motor skills issues, ask your pediatrician for a referral to an Occupational Therapist for an OT evaluation.
2. Touch the lines.
Many kids have a hard time organizing their own printed work on a piece of paper. They may even start in the very center or toward the right edge of the page. If needed, fall into a habit of giving explicit instruction, or explaining clearly things that many kids just pick up without being told. In handwriting, that involves the rule to “Touch the lines.” I teach kids to start a letter by touching a line and end by touching a line for both manuscript or cursive handwriting styles. If needed, there are specialty papers that have slightly raised lines to encourage a sensation of where to start and stop. Other specialty papers are color-coded for the top, mid, and bottom lines, or they have bolder lines so kids are less likely to have the letters sit in a random space.
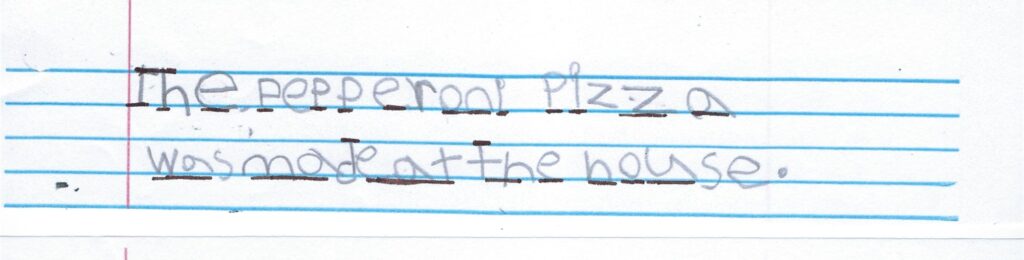
To evaluate touching lines, I make a mark on the top and bottom lines where the student is touching the line. The majority of the letters should be touching the bottom and/or top line depending on the current goal.
3. Spacing.
Spacing between letters.
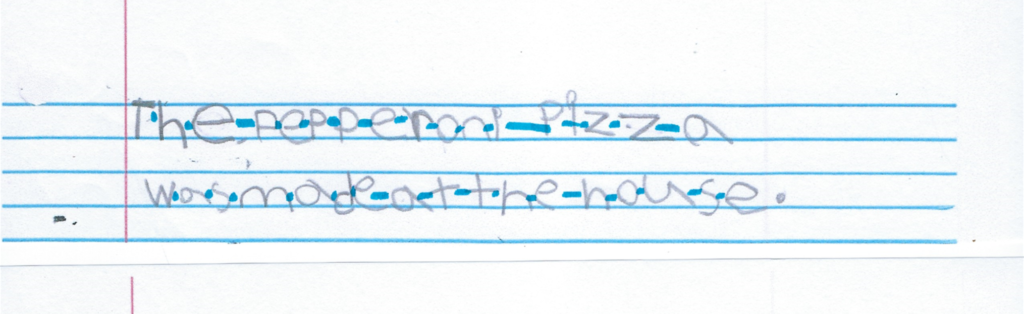
Spacing properly between the letters of a word can improve legibility. Some kids make very skinny letters that are scrunched together, which can make certain letter combinations seem like a different word. Other kids put too much space between letters and about the same space between words, so the reader sees a string of letters rather than clusters of meaningful words. To evaluate spacing between letters, I draw a tiny horizontal dash between the letters in a whole line of print. The little dashes should be consistently about the same size. Channie’s has a unique penmanship paper that has green boxes and lines for guided letter spacing.
Spacing between letters.
Spacing between words is also important for legibility. With too little space, the words run together like hashtag phrases on Instagram. Too much space between words can use up too much space. Kids can get frustrated when they have too much space and run out of room. A good rule of thumb is to use one finger on the non-dominant hand to be a guide for word spacing. Or a regular skinny popsicle/craft stick can be a good guide for word spacing.
To evaluate spacing, I make a tiny line from edge to edge between the letters and words. There should be a consistent small space between the letters and a consistent slightly larger space between the words.
4. Vertical Size.
Vertical size of letters may not seem like a big deal, but when kids are given narrow lined paper too early, they can develop a habit of disregarding the lines that bring immediate legibility to their penmanship. There are several mnemonic helps for kids who need visual cues for vertical size. One mnemonic cue is, “Upstairs, Downstairs, Basement.” Another mnemonic cue is, “Sky, Grass, Underground.”
Some kids who have difficulty with visual-spatial awareness need to use primer paper with a middle-dotted line way longer than other kids. For older students who still need a dotted mid-line, I use 3rd grade primer paper so the vertical space between lines is around ½ inch. That is close to the vertical space of wide-lined paper. Some kids in middle to high school may benefit from using college-ruled paper as if it were paper with a dotted midline.
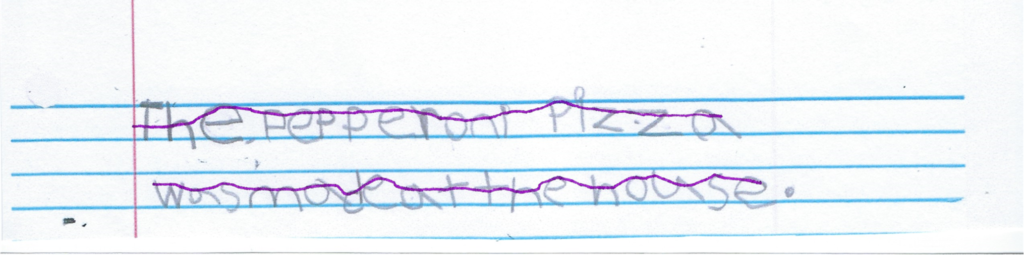
To evaluate vertical size, I lightly draw a horizontal line across the top of the letters and words in a line of handwriting. When I look at the overall line drawn, it should be mostly straight. If the drawn line is wavy, then vertical size should be worked on.
5. Slant.
Slant has varied over the years with different handwriting systems. Some systems have a vertical slant for both manuscript and cursive. Others are slanted to the right. Left-handed writers often slant to the left. Regardless of the slant you use in your handwriting program, the rule for legibility is to have a consistent slant.
If the slant varies a lot, one intervention can be specialty lined practice paper used for calligraphy. You can get vertical and right slanted calligraphy paper. Also, there are slant templates that you can place beneath your choice of handwriting paper that shows through for the child to have a guide without it being on the paper they are writing on.
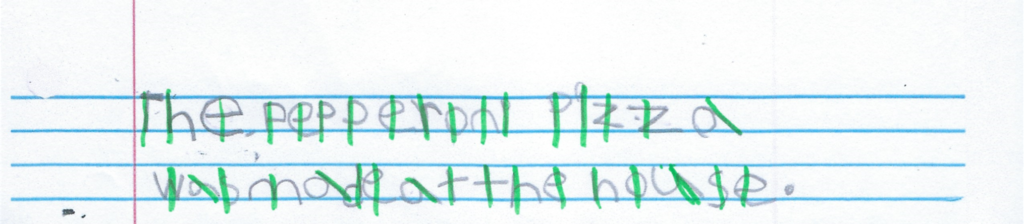
I evaluate slant by drawing a vertical or diagonal line on the “spine” or down the middle of each letter for a whole line of handwriting. When you look at the whole line, you should see parallel lines.
6. Formation of letters.
Letter formation varies greatly from one handwriting program to another. Most elementary homeschoolers prefer either traditional or modern. Some teach cursive from the start. Others like the look of the Italics style. Even though I have had students using all different kinds of handwriting programs and systems, I have seen one common result. By 5th or 6th grade (between ages 11 and 13), most kid have solidified their own formation style, which is often a combination of styles taught and their own spin on formations. This age range is also a time when developing a signature is appealing to kids.
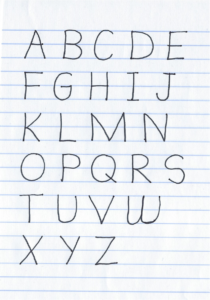
Here are my letter formations with a start/stop on a line for manuscript letters:
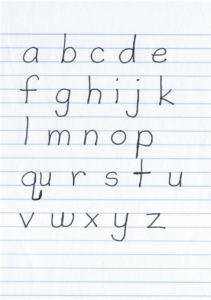
Here are my formations for lowercase manuscript letters:
The importance of learning a specific formation of letters is more important when kids are younger. I’ve actually heard both teachers and parents refer to a specific style as “the right way” to write letters. In my experience, the style is less important as the starting location for each letter. Many kids with dysgraphia form letters in reverse or end up with illegible letters because of starting the letter in an awkward position. Some children start manuscript letters from the bottom up or they have difficulty knowing how to connect cursive letters. Here are some examples of letter formations that I typically spend time teaching directly to help a child have more legible handwriting.
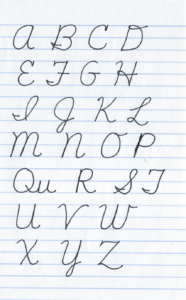
Here are my letter formation for upper case cursive letters:
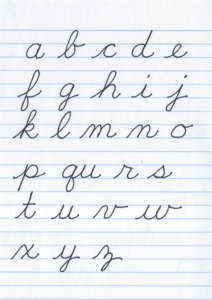
Here are my cursive lowercase letters:
In summary, the 6 rules of legible handwriting are:
- Hold your pencil correctly. (20 points)
- Touch lines. (20 points)
- Space between letters. (10 points)
- Space between words. (10 points)
- Vertical letter size. (20 points)
- Letter formation. (20 points)
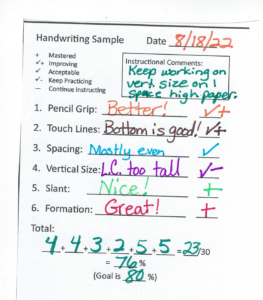
When evaluating handwriting, I have a checklist and mark each of the 6 rules with a + for mastered, a ü for improving or practicing, and a – for still needing instruction or on-going. I do not usually give percentage or mastery grades for handwriting, but if your state law requires grades, you may assign 20 points to items 1, 2, 5, 6, and 10 points to items 3 and 4. Mastery level is 80%, 80/100 points or 16/20 points and 8/10 points for individual items.
Click here to find a printable copy of this evaluation checklist at my TPT store.
By the way, as a homeschooler, I decide if the evaluation information is for my own use to plan for on-going instruction or if I will share the evaluation with my child for their own improvement. Some kids can handle seeing their work assessed; while others melt and shut down. Please cautiously share with your child the evaluation of their handwriting in a way that will help them feel positive about their efforts and want to make their penmanship more legible.
If you have a handwriting style you like, there is probably a homeschool penmanship curriculum for it! However, after teaching kids the handwriting rules and how to form the letters, you can give them just about anything to copy for handwriting practice. You can even integrate it into written language by having your child dictate a sentence based on each letter and then copy it. I have also gathered short poems of 4 to 8 lines and had students copy them.
You don’t have to evaluate every handwriting practice sample! Typically, once a week for younger children and once a month for older kids is enough to be able to see if they are making improvement toward legible penmanship. Following a systematic way to mark the rules in a copy work sample and using an objective checklist to evaluate, you can easily determine if the legibility is improving.